Erica over at
My Cricut Craft Room is hosting a 100+ Cricut Cartridge Blog Hop! The hop will be from June 3-6th. I hope you are able to hop along with us as we look at projects made with over 100 Cricut Cartridges! If you came from
Jen's blog you are on the right track. If not, you can go back to
Erica's blog and start from the beginning.
For my projects, I used the following Cartridges:
Pooh and Friends, Pooh Font, Create a Critter, Once Upon a Princess, and Boys Will be Boys.
Here is my 1st layout:
For this layout I used the Flower Shower Spring Stack from DCWV. Here is a list of the sizes everything was cut at:
- The Sun: I forgot to write it down:(
- The Tree: 8"
- The Sign: 3"
- Piglet: 5"
- Pooh: 6"
- Bees: 1/2" and 3/4"
- Branch with Beehive: 5 1/2"
- Tigger: 3 1/2"
- Title: 2"
Close up of page 1
Close up of sun. I drew on the smile and added some ovals for eyes.
Close up of sign and piglet.
Page 2
Close up of Tigger. I hid his chin underneath the photo mat. I also cut off his paws and pop dotted them.
Close up of Beehive.
Close up of Pooh.
For my second project, this is a layout using Create a Critter.
The paper comes from DCWV's Pet Stack. For the dogs, I used the base with no cut marks. I cut ovals from the George cartridge for the eyes, nose and for the peeking dog's paws. For the hydrant, I cut the base with no cut marks. I cut it twice, once in red and once in metallic silver and then I layered the silver parts I wanted on the red.
Dogs: 5 1/4"
Food Bowl: 3"
Big Bone: 3"
Hydrant: 6"
Title: 6"
Smaller Bones: 1 1/2, 2, and 2 1/4"
Page 1
Page 2
The rest of the dog is behind the photo mat.
Close up of dog 1
Close up of title
Close up of peeking dog.
Close up of hydrant.
For my third project, I made a tri-fold card using Once Upon a Princess.
For this card, I welded 2 rectanges of different sizes to the bigger rectangle. The smallest rectangle is 4 x 1 1/2, the middle rectangle is 4 x 2 1/2 and the largest for the card base is 4 x 5. The cupcake is welded to the middle rectangle and is 2 3/4". The word "Birthday" is welded to the smallest rectangle and is 3/4". You have to remember when doing this to flip your shapes so that when you fold the card you can read the word. For the paper, I used the Party Time stack by My Mind's Eye.
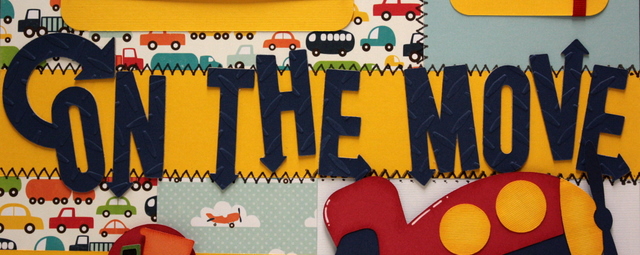
And now for my last project, I did a layout using Boys Will Be Boys.
For this, I used Echo Park "Little Boy" paper.
The plane 4 1/2"
Dump truck 1 1/2"
Title 2"
Train 1 1/2"
Page 1
Page 2
I hope you have enjoyed looking at my projects and I would love it if you would follow my blog and like my
fanpage. There are plenty more to see as well as prizes and blog candy along the way. Next on the list is
Kat. Thanks for looking!







 Posts
Posts


